Thursday, May 31, 2012

Work in Progress

Welcome to my first round of writer’s block since starting the blog.  I mean, I feel pretty silly that it has taken me this long to get back here, especially considering all of the cooking I have been doing this week.  There have been waffles (a little soft, so I’ll get back to you on these after I give it another go this weekend), pita, falafel, chickpea cakes (seriously, try these), and countless dressings to top salads made from gorgeous late spring produce.  Exhibit A: rainbow carrots.
I also made some pesto that I have been hesitant to write about since I am not sure it turned out exactly how I envisioned.  But, if we're being honest, most nights in the kitchen do not result in culinary masterpieces.  I try recipes, swapping ingredients as I see fit, and hope for the best.  And you know, I think there is something to be said for being honest with yourself (and others) in admitting that perfection isn’t always the goal.  If I wanted to eat something I knew I would love the first time around, I would need to stop tampering with recipes-- and that's not going to happen anytime soon.  This pesto was good, but I can think of a few ways I might change it next time.  Something to look forward to, right?
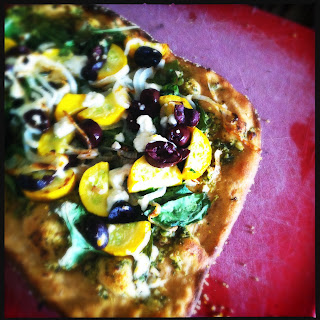
In the past few days, this pesto has made an appearance on pizza, salmon burgers, and falafel salad (for this I added a bit more lemon juice and a scoop of tahini, which turned out delicious).  Let me know if you try it and come up with any great variations!


Parsley Cilantro Pesto
adapted from Adrienneats

This pesto is not a creamy as I remember other pesto sauces being, but this may be due to the water content in parsley/cilantro versus basil (this is purely speculative).  You might consider adding water or more oil (just a little bit at a time) until you reach the desired consistency.  

2 cups flat leaf parsley, roughly chopped
1 cup cilantro, roughly chopped
⅓ cup almonds
2 cloves garlic, minced
3 tsp. white miso
juice of 1-2 lemons (start with one and add more to taste)
2 Tbsp. + 1 tsp. olive oil (start with the 2 Tbsp and add more as needed)
salt and pepper to taste (do not add salt until you taste the pesto, as miso tends to be pretty salty on its own)

Combine all ingredients in the bowl of a food processor and process until smooth (this may take a minute or two).  Add more oil, lemon juice, and salt as needed.

Wednesday, May 23, 2012

Simple Joys

Anyone who has spent more than a couple of days with me knows that I love bananas.  As in I eat at least one and a half bananas most days of the week, and I am still not tired of them.  I even received this thoughtful gift from my lovely boyfriend a few anniversaries back (to the dismay of my coworkers who thought I was smuggling inappropriate items into the childcare center).

Another thing you might know about me is that I love ice cream and will eat it every day if the opportunity presents itself (which it usually does when a carton of Tillamook Mudslide is tucked away in the freezer).  As you can imagine, a daily ice cream habit does not exactly fit in with my no-refined-ingredients-packaged-food-free lifestyle, so I have been on a quest to find a happy balance.  

Friends, I have found the solution: banana ice cream. 


This one doesn’t even need a recipe since all you do is peel and freeze some ripe bananas, blend them in a food processor and serve.  Done.  Ok, I will add that I used three bananas and a few splashes (approximately 3-4 tablespoons) of almond milk to achieve a smooth consistency and it yielded about 1.5 cups of ice cream.  I tossed in some chopped strawberries at the end, but you could try peanut butter, chocolate chips, cocoa powder...you get the idea.

Happy (almost) summer.

Wednesday, May 16, 2012

Waste Not


I, like many of you, love a good deal.  Buy two get one free?  Sure.  One basket of strawberries for $4.00 or three baskets for $8.00?  Is that a serious question?


Deals are fabulous when you are feeding a family, or maybe even two people, but when all you have to worry about is feeding yourself, three baskets of anything can feel a bit excessive.  This really becomes a problem when the bulk product on hand is fresh-- in other words, perishable.  The last thing I want to do is save a few bucks on some gorgeous produce and then throw half of it out at the end of the week.  These are the issues that keep me up at night.  


This week my mission was to do something useful with the aforementioned three baskets of strawberries I just couldn’t pass up at the market.  Cake has often been my method of choice for using up a whole bunch of strawberries at once, and this time I chose to try a recipe from My New Roots.  I am always on the lookout for a solid cake base that uses no refined ingredients, and, let me tell you, this cake delivered.  


However, the cake is definitely not for those of you who expect intense sweetness from dessert.  In fact, I would argue that a piece of this cake would be just as welcomed at breakfast as it is at dessert (maybe just skip the ice cream...or don’t), so you make the call.  The original recipe includes a rhubarb-honey sauce to be served atop each piece of cake, but since I did not see rhubarb at the market this week (did I already miss the window?) I opted for a side of ice cream and a drizzle of maple syrup instead.  Any way you choose, I don’t think you’ll be disappointed.


Strawberry Cake
via My New Roots

Just a quick note about the chia seeds, since I know that this is not an ingredient everyone has on hand: the chia seeds in this recipe function as a replacement for an egg, so please do not omit them unless you plan to use an egg instead!  If you would rather use an egg, just omit the seeds and use 3 tablespoons less milk, although I encourage you to experiment and try the chia seeds in baking.  As a rule of thumb, 1 tablespoon chia seeds + 3 tablespoons water (or, in this case, milk) = 1 egg.

1 ½ cup whole wheat pastry flour
½ cup rolled oats, plus a sprinkle for the top of the cake
½ tsp. salt (I used kosher)
1 tsp. baking soda
zest of one lemon
1 heaping cup strawberries, chopped
½ cup milk (I used almond milk)
1 cup unsweetened applesauce
⅓ cup maple syrup (or honey)
3 tbsp. coconut oil, melted
1 tbsp. chia seeds

Preheat the oven to 375 F and line a cake pan (or small square baking dish) with parchment paper.

In a large bowl, combine the milk, applesauce, oil, maple syrup, and chia seeds.  Set aside for about 10-15 minutes, giving the seeds time to form a gel with the liquid ingredients.

In a medium bowl, mix together all remaining ingredients, except for the strawberries.  Gently stir the dry mixture into the wet mixture until just combined.  Fold in the strawberries in as few strokes as possible.

Pour the batter into the prepared pan, sprinkle some rolled oats over the top, and bake for 30-35 minutes, or until a tester inserted in the middle of the cake comes out clean.

Allow the cake to cool completely in the pan, then serve with a drizzle of maple syrup and ice cream.

Wednesday, May 9, 2012

Skillet Bread


The idea of this post is simple, so I want to keep this description short and sweet.  If you like bread, but sometimes hate the thought of turning on your oven and waiting one whole hour for your bread to be golden and delicious (and that’s if you’re making quick bread), this recipe is for you.  Get out your food processor, throw in five ingredients I guarantee are already in your cupboard (well, maybe not the white whole wheat flour, but keep reading to find out why it should be), form adorable little bread patties, and cook them in a skillet.  About 20 minutes later, sit down to fresh bread.  Done.


I do want to make a quick mention about the white whole wheat flour I chose to use in this recipe because I have tried a number of combinations and this one consistently yields the best results.  The original recipe calls for all-purpose flour, but I tend to go to great lengths to to avoid refined grains (which mostly means that I ruin a lot of perfectly wonderful recipes by substituting whole wheat flour for the all-purpose).  Having tried other combinations of whole wheat flours for this bread, I think I have finally settled on white whole wheat being the best option.  This flour produces a light, fluffy bread, whereas regular whole wheat yields a very dense bread that feels like work to consume.  So, what makes white whole wheat white?  Well, it’s simple really: the flour is made from white wheat berries. Regular whole wheat, on the other hand, is made from the red wheat berry and is much darker in color than white whole wheat.  Both flours, however, retain the outer bran layer of the wheat berry that is lost in the refining process of all-purpose flour.  The bran is where most of the nutrients and fiber of the wheat berry are found, so it’s such a shame when the bran stripped away through refining.  If you are wary of switching to whole wheat, I recommend starting with white whole wheat because its mild flavor makes it an easy substitution for all-purpose flour.


Olive Oil Salt Skillet Bread
adapted ever so slightly from Mark Bittman’s How to Cook Everything
makes 6 2-inch rounds of bread, or 1 8x4 inch loaf

This recipe is halved from the original printed recipe, so it serves three people (perfect if you are cooking for one or two and want leftovers), but if you’re feeding a crowd then definitely double these amounts.  The bread is best right off the stove, but I tend to keep mine at least a couple of days loosely wrapped in wax paper.  Allow the pieces to cool completely before storing.

I am only going to give detailed instructions for the skillet method here, but if you feel like baking, turn on your oven to 375 and bake the bread for 25 minutes covered with foil, remove the foil and sprinkle with coarse salt, then continue baking (uncovered) for 20 minutes more.  
Lastly, even if you do not have a food processor, skillet bread is not out of reach!  The food processor definitely makes life easier, but the dry ingredients can easily be mixed in a bowl and the wet components mixed in.  You will need to turn the dough out onto a very lightly floured cutting board to knead for a minute or two, just until the dough forms a cohesive ball. 

1 ½ cups white whole wheat flour
½ tbsp. baking powder
½ tsp. coarse salt, plus more for sprinkling (I used kosher)
just over 2 ½ tbsp. olive oil, plus a bit more for the pan (the original recipe calls for ⅓ cup, so this is approximately half)
½ cup warm water

In the bowl of a food processor, pulse together flour, baking powder and salt.  With the machine running, slowly add olive oil through the feed tube.  Slowly pour in the water through the feed tube and mix until a ball forms.  The dough should be cohesive and only slightly sticky to the touch.  In other words, very easy to handle.  This is what mine looked like:


Separate the dough into 6 pieces, each about ½ inch tall, and sprinkle the tops with coarse salt.  Heat a drizzle of olive oil in a pan over medium heat (I used a non-stick pan so I did not need much oil, but use more if you are using cast iron or something similar).  When the pan is fairly warm, add a few of the dough rounds (salt-side up) without crowding the pan (I cooked mine in two batches).  After 5 minutes check each piece for browning and flip if needed (the recipe says 5 minutes, but mine took more like 8 ½ minutes on the first side).  The bottoms should be golden and the tops should be puffed up a bit.  Cook another 5 minutes or so on the other side, but be aware that this side will mostly likely cook a bit faster than the first.

Serve bread warm.

Sunday, May 6, 2012

(Nearly) Instant Pizza Dough

Last weekend I took a gamble and tried out a new recipe for pizza crust, and let me tell you, it was not pretty.  I mean the final result was fine, but it was nothing to write home about.  The middle never quite cooked all the way through, making a pizza slice hard to handle while holding a margarita in the other hand.  A tragedy, really.


For a while now I have been using Mark Bittman’s basic pizza dough recipe from How to Cook Everything, and ultimately I have been pretty happy with it.  The dough always tastes great and cooks thoroughly, but I could never roll it out thin enough to achieve a thin and crispy final crust.  Recently the blog world has been talking about a new Bittman recipe for no-work dough, which uses less yeast and requires a much longer rise period.  I thought I would give the recipe a try, with a few substitutions to make the dough 100% whole wheat.  I think this is where the process took a turn for the worse, but I cannot say for sure.  Anyway, this dough did not treat me well and I hope that someday I will give it another try, but I can’t make any promises.

I’m not too distressed, though, because I have since found my new go-to recipe for thin, no planning required, dream pizza dough.  I read about this crust a couple weeks ago and have been meaning to give it a try, but I have been wary of the fact that it literally requires no rise time.  How is that possible, right?  Then Friday evening hit and I found myself hungry and still craving pizza, so I gave it a go.


Honestly, you cannot run out to Trader Joe’s and buy pre-made dough faster than you can make this.  The dough is even easy to roll out-- no springing back every time you finally get it the size you want.  I will admit to burning the first pizza I baked (the original recipe says to bake it for 15 minutes, but mine was done much sooner), but the next day I was much more successful.  Just keep an eye on yours and don’t leave the kitchen to sit on the patio (like I did) until the pizza is done.


Pizza night just became far too convenient.

No Rise Pizza Dough
adapted from The Faux Martha
makes 4 personal size pizzas (about 9 inches round)

Note that I have made this dough 100% whole wheat, but if you do not have all of these flours on hand, feel free to substitute 1 ¾ cups all-purpose flour for the white whole wheat and whole wheat pastry flours.  Also, nutritional yeast can be found in the bulk sections of most health food stores and it is really not as scary as it sounds (nor does it taste anything like yeast).  Basically, nutritional yeast is a great vegan substitute for cheese, and lately I have been using it in doughs that call for parmesan.  Use whatever feels most comfortable/accessible because, after all, this recipe is ultimately about making your life more convenient, right?

One more thing, if you do not want to use all the dough in one sitting, simply wrap the extra dough balls in plastic wrap and freeze for up to a month.  When ready to use, bring to room temperature before rolling out and baking.

1 cup warm water
1 tbsp. olive oil
1 tbsp. unrefined cane sugar (or plain white sugar, if that’s what you have)
2 ¼ tsp. instant rise yeast (or 1 packet)
1 ¼ cup white whole wheat flour
½ cup whole wheat pastry flour
1 cup whole wheat flour
¼ cup nutritional yeast (or grated parmesan cheese)
1 tsp. salt (I used kosher)

Preheat the oven (and pizza stone, if you have one) to 450 F.

In a small bowl, combine water, olive oil, sugar, and yeast.  Stir and then allow to rest for about five minutes.  You want the yeast to “bloom” (i.e. foam).  If your yeast never develops, try again with different (perhaps fresher) yeast.

In the bowl of a food processor, pulse together flours, nutritional yeast and salt.  While the machine is running, pour the yeast mixture through the feed tube and process until a ball of dough forms (this usually takes about 30 seconds).  The dough should be slightly sticky to the touch, but very manageable.  If it seems too wet, add more flour one tablespoon at a time.  If the dough seems too dry, add water one tablespoon at a time.

Transfer dough to a lightly-floured cutting board and separate into four pieces (or less, depending on the pizza size you are after).  Roll each piece about ¼ inch thick, making sure there are no tears in the dough.  

Drizzle a bit of olive oil over the top of the dough, sprinkle with salt and a few grinds of pepper, then add your toppings.

If you are using a pizza stone, slide pizza directly from cutting board onto stone (sometimes you need to coax the dough off the cutting board with a spatula).  Otherwise, slide pizza onto a lightly oiled baking sheet.  Bake for 8-13 minutes, or until crust is golden and cheese on top is starting to brown and bubble.

Mexican Pizza Toppings
These ingredients reflect what was in my refrigerator on Friday evening, so use whatever you have on hand!  

1 tbsp. olive oil
½ large red onion, finely chopped
1 clove garlic, minced
¾ cup black beans or about 1 can (I did not drain mine, but if using canned beans drain a bit of the liquid off)
a few handfuls of chopped kale
1 tsp. cumin
½ tsp. oregano
a big pinch of cayenne pepper (or less depending on how much heat you like)
a pinch of red pepper flakes
salt and pepper
crumbled feta cheese
avocado, sliced
hot sauce or salsa

Heat oil in a medium skillet.  Add onion and cook, stirring occasionally, until starting to brown (about 10 minutes).  Stir in spices, garlic, and a dash of salt, then cook for about 30 seconds, until fragrant.  Add kale and another pinch of salt, then cook for a few minutes until kale has started to wilt.  Stir in black beans and season to taste.

Spoon a bit of the mixture onto each pizza crust, being sure not to overload the dough (this will make the pizza soggy).  Crumble some feta over the whole thing and bake as directed above.

Top cooked pizza with slices of avocado and a few dashes of hot sauce.